- Permission to manage channels in Replyful.
- One of these on the Google side: a sign-in to the support mailbox in Gmail, or a Google Workspace admin account.
Create the inbox in Replyful
1
Choose email forwarding
Go to Channels → Email and click Create inbox. Select Email forwarding and click Continue.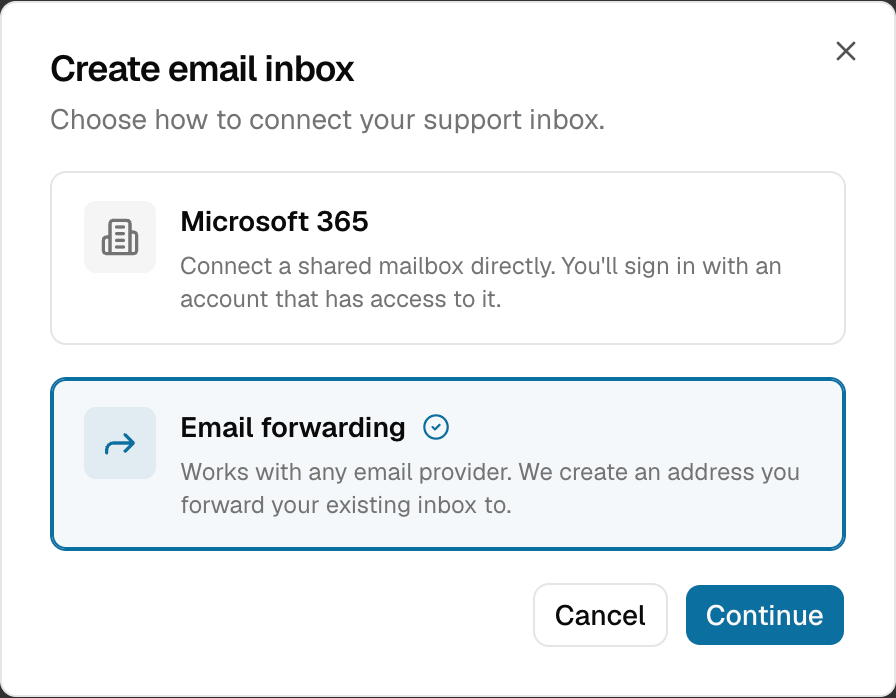
2
Enter your support address
Enter the address your customers write to today, for example 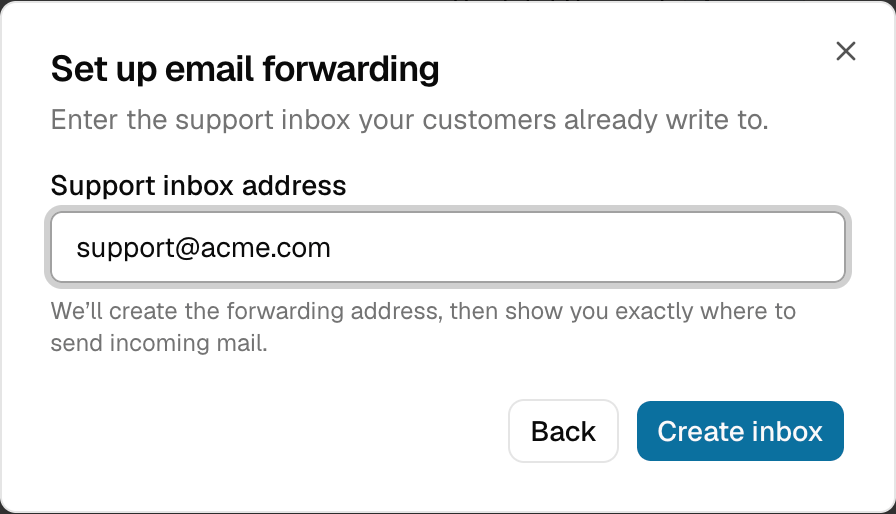
[email protected], and click Create inbox.3
Copy the forwarding address
The new inbox opens. Under Email address → Forwarding, copy the forwarding address. It ends in 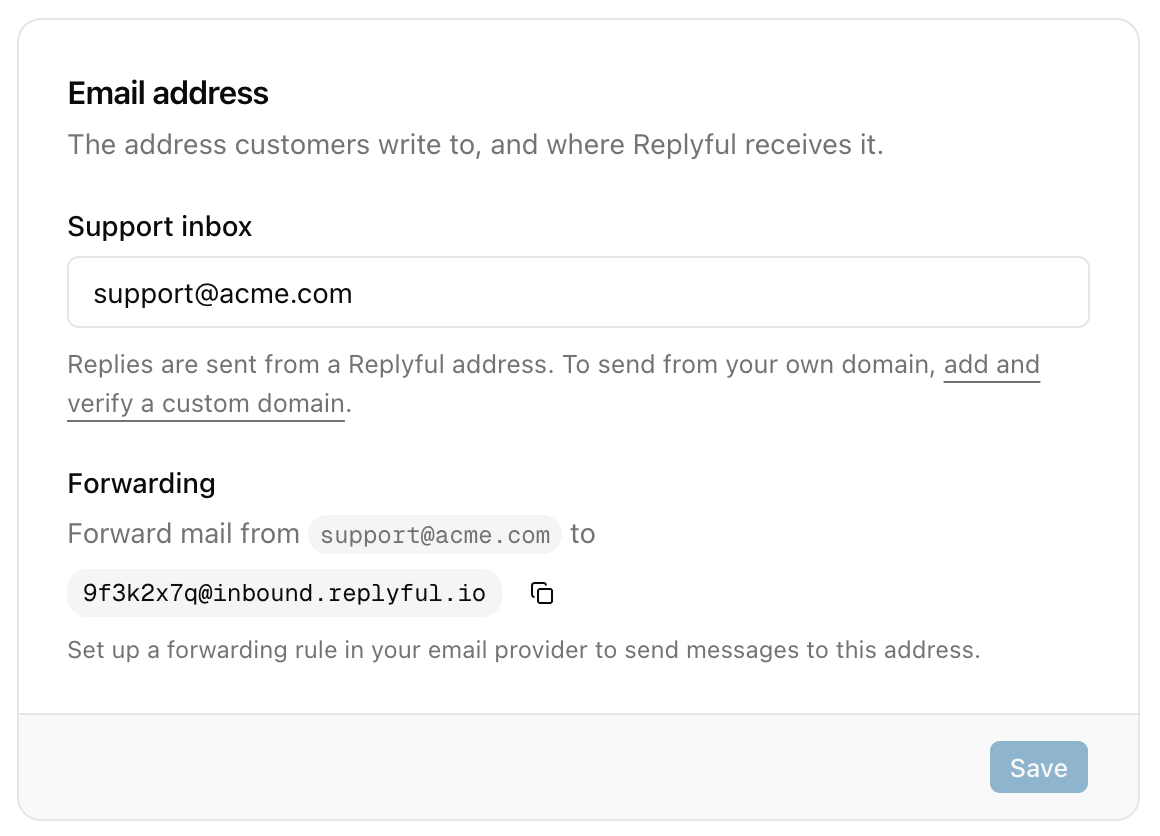
@inbound.replyful.io.Forward mail from Google Workspace
There are two ways to do it. Pick one.Forward from Gmail settings
1
Open forwarding settings
Sign in to Gmail as the support mailbox. Click the gear icon, then See all settings, then the Forwarding and POP/IMAP tab.
2
Add the forwarding address
Under Forwarding, add the forwarding address you copied from Replyful. Gmail sends a verification email to that address.
3
Verify it in Replyful
Gmail’s verification email arrives in Replyful as a new ticket. Open it and click the verification link.
4
Turn on forwarding
Back in Gmail, select Forward a copy of incoming mail to and pick the forwarding address. Leave the second option on keep … copy in the Inbox so you still have the original. Click Save Changes.
If you can’t add a forwarding address, your Workspace admin has turned off automatic forwarding. They can turn it on in the Google Admin console under Apps → Google Workspace → Gmail → End User Access → Automatic forwarding.
Forward with a routing rule
A routing rule sends your support mail to Replyful before it reaches any mailbox. You don’t need a verification step.1
Open default routing
In the Google Admin console, go to Apps → Google Workspace → Gmail → Default routing. Click Configure, or Add another rule if you already have rules.
2
Match your support address
Under 1. Specify envelope recipients to match, choose Single recipient and enter your support address.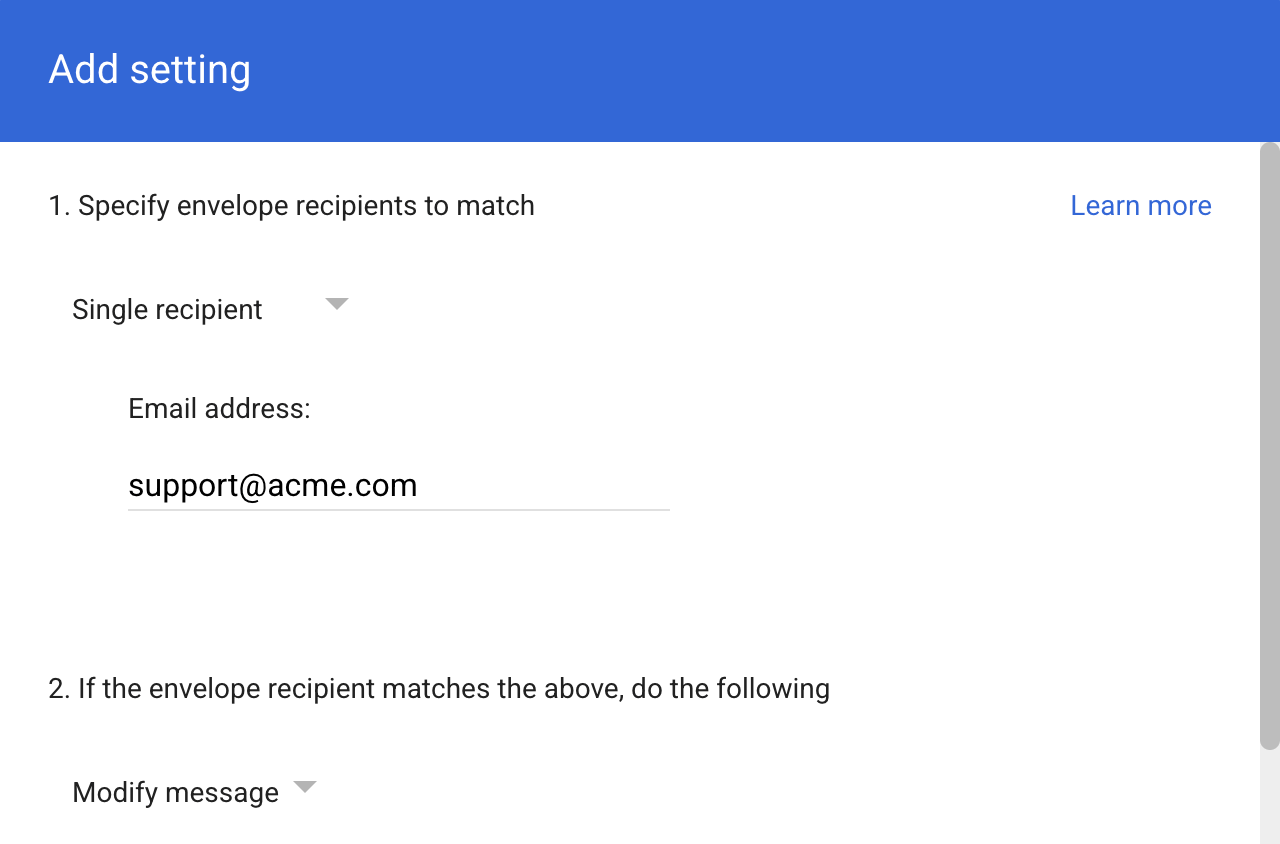
3
Send it to Replyful
Under 2. If the envelope recipient matches the above, do the following, keep Modify message. Under Envelope recipient, tick Change envelope recipient, choose Replace recipient and paste the forwarding address.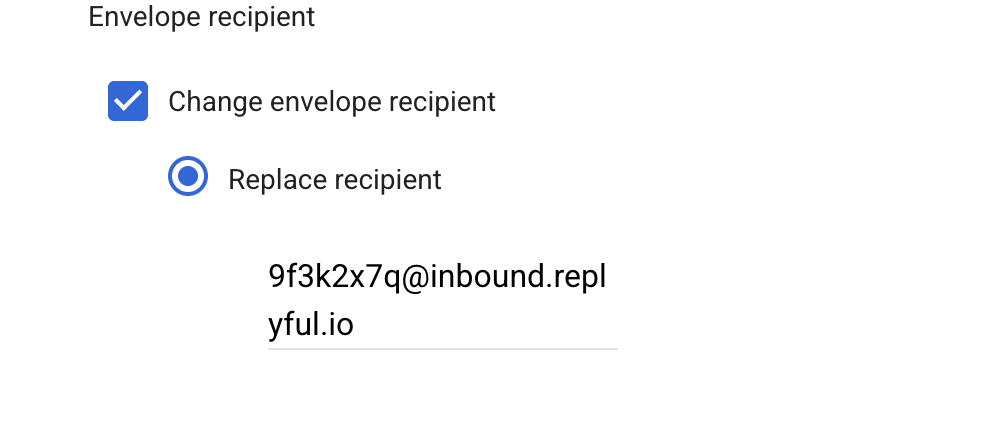
4
Apply it to every address and save
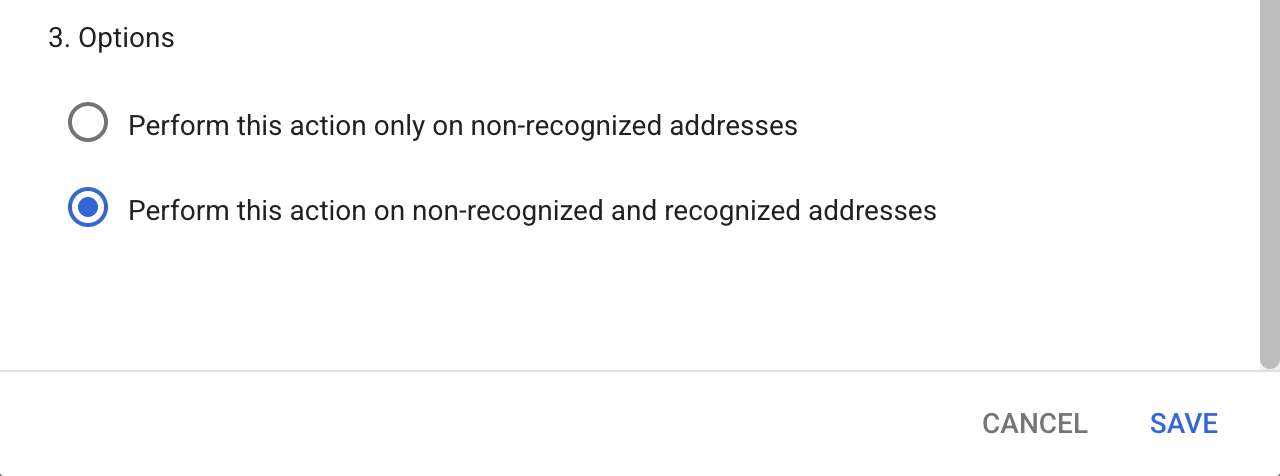
Under 3. Options, choose Perform this action on non-recognized and recognized addresses, so the rule works whether your support address is a user, a group or an alias. Click Save.