

Connecting the mailbox is the better choice for most teams. Forwarding is the better fit when:
- Your organization doesn’t let third-party apps access mailboxes.
- The mailbox gets a very high volume of email. Microsoft limits how often one app can call a single mailbox (10,000 requests per 10 minutes), and forwarding has no such limit.
- You don’t want the inbox to depend on one person’s account. A connected inbox stops working if that account is removed or loses access.
Connect a shared mailbox
Before you start, you need:- A shared mailbox in Microsoft 365, like
[email protected]. - A Microsoft account that can open the shared mailbox and send as it. You sign in with this account, because shared mailboxes can’t sign in themselves.
- Permission to manage channels in Replyful.
1
Give your account access to the shared mailbox
In the Exchange admin center, go to Recipients → Mailboxes and open the shared mailbox. On the Delegation tab, add the account you’ll sign in with under both Send as and Read and manage (Full Access).Without Send as, Replyful can read the mailbox but can’t send replies from it.For replies your team writes in Outlook to show up on tickets, the shared mailbox also needs to keep a copy of mail sent as it. Exchange saves those copies only in the sender’s own Sent Items by default. In the Microsoft 365 admin center, go to Teams & groups → Shared mailboxes, open the mailbox, edit Sent items and tick Copy items sent as this mailbox. Or run 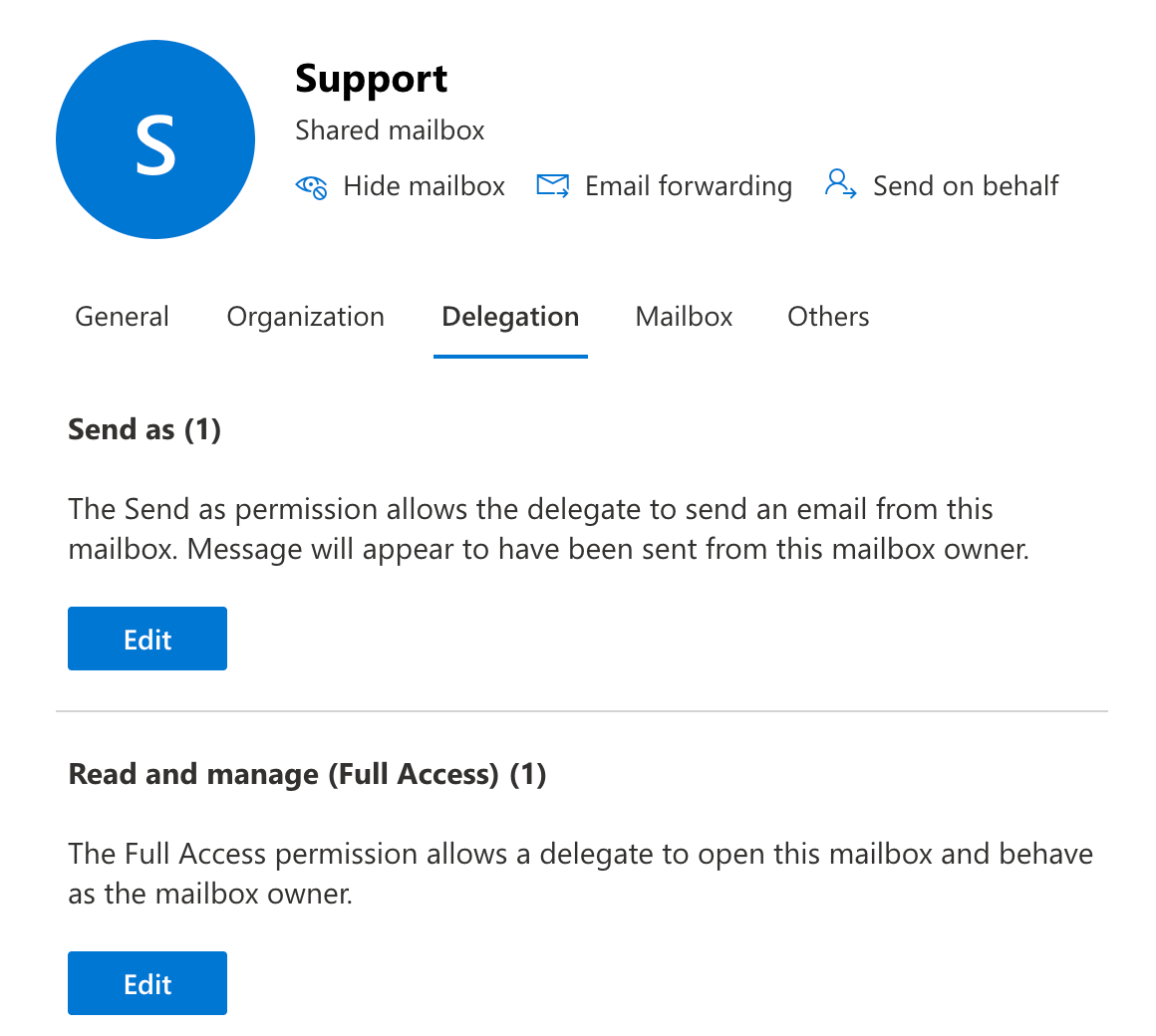
Set-Mailbox -Identity [email protected] -MessageCopyForSentAsEnabled $true in Exchange Online PowerShell.2
Create the inbox in Replyful
Go to Channels → Email and click Create inbox. Select Microsoft 365 and click Continue.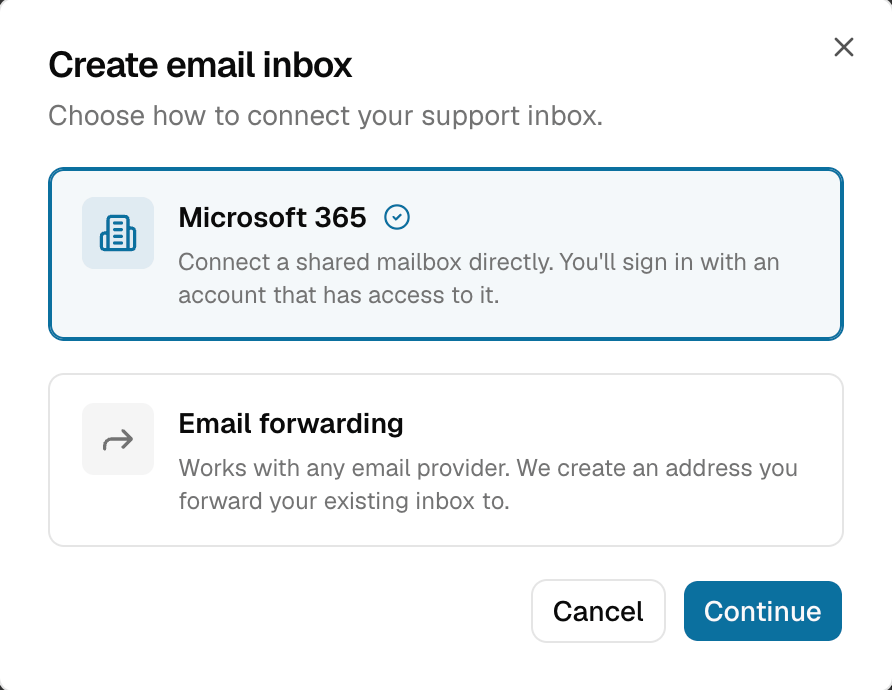
3
Enter the shared mailbox and sign in
Enter the shared mailbox address and click Continue with Microsoft. Sign in with the account from step 1 and accept the permissions Replyful asks for: reading and sending mail, including in mailboxes shared with you.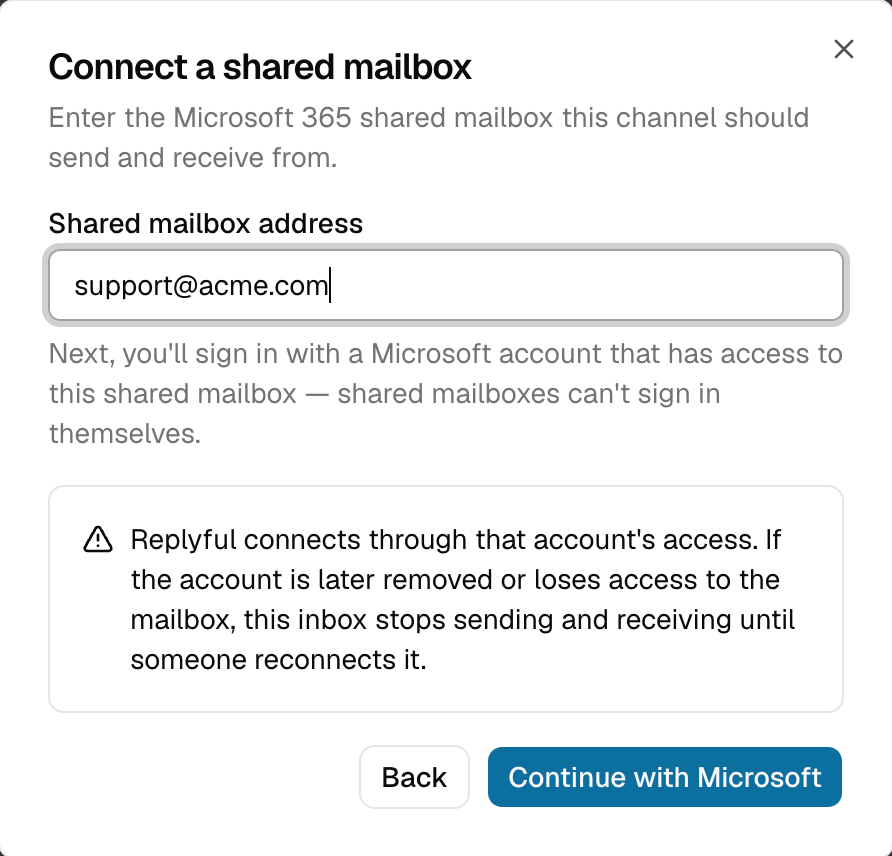
4
Watch first, then go live
The new inbox starts out observing. Replyful copies every email and every reply into tickets, but sends nothing. Keep answering in Outlook for a few days to see how it looks, or go live straight away.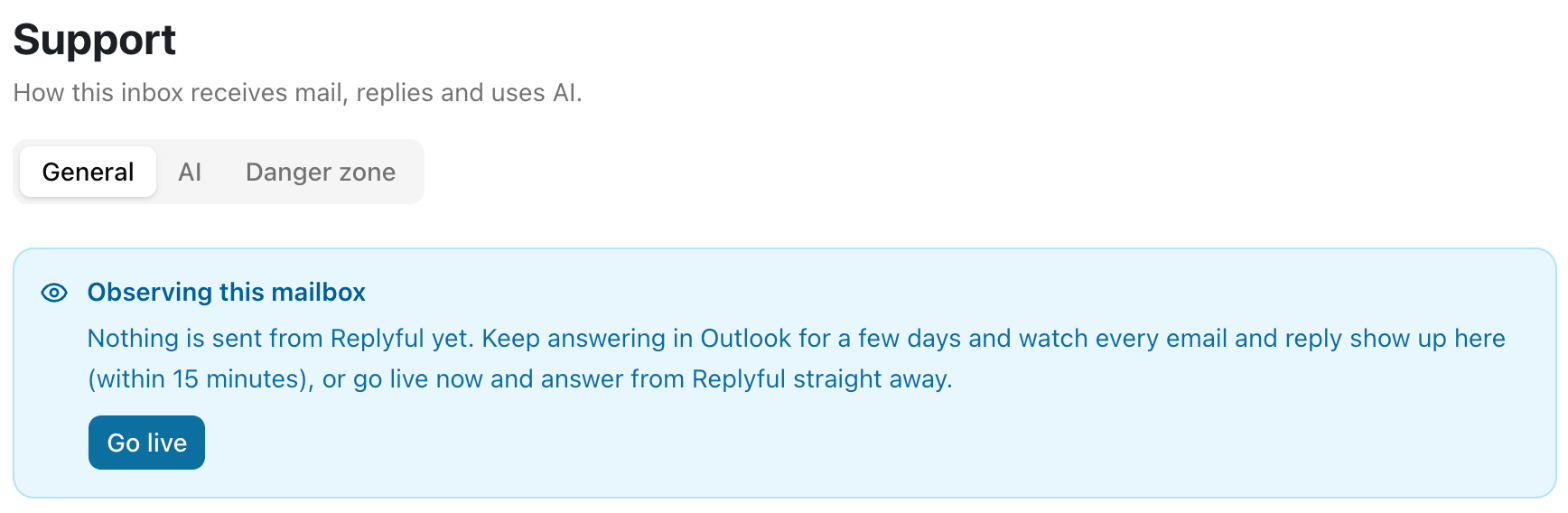
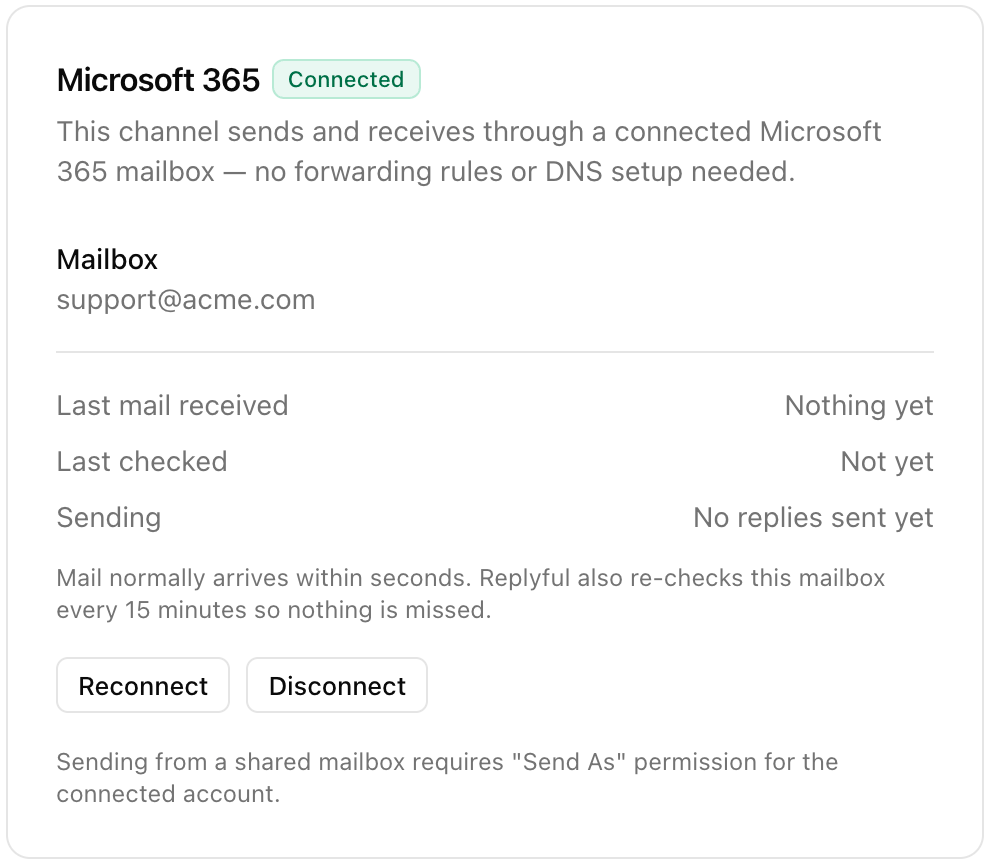
If something goes wrong
Forward from Exchange Online
Before you start, you need a Microsoft 365 admin account and permission to manage channels in Replyful.1
Create a forwarding inbox in Replyful
Go to Channels → Email and click Create inbox. Select Email forwarding, enter your support address and click Create inbox. Copy the forwarding address from the inbox page. It ends in 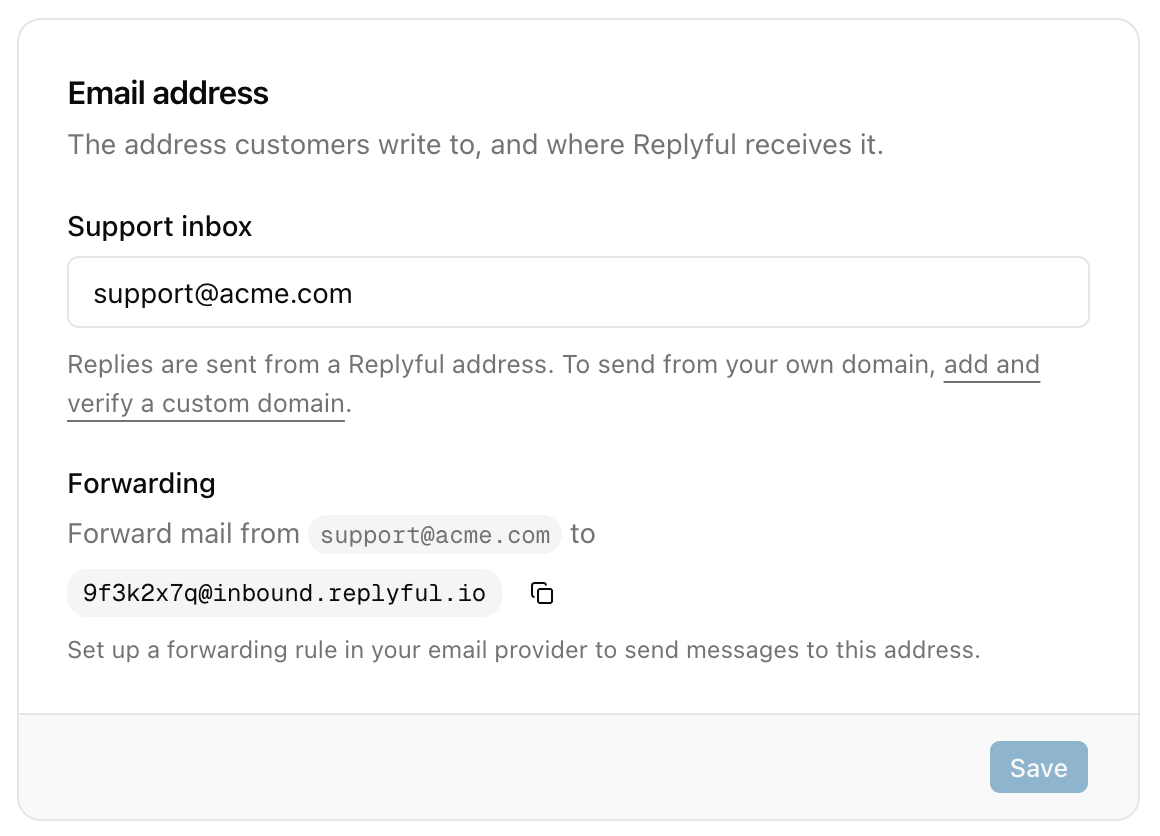
@inbound.replyful.io.2
Allow forwarding to Replyful
Microsoft 365 blocks automatic forwarding to external addresses by default, and Replyful’s address is external. In the Microsoft Defender portal, create an outbound anti-spam policy that applies only to your support mailbox, and set Automatic forwarding rules to On - Forwarding is enabled.If you skip this, Exchange returns forwarded mail with the error
550 5.7.520 and nothing reaches Replyful. See Microsoft’s guide to controlling external email forwarding.3
Forward the mailbox
In the Exchange admin center, go to Recipients → Mailboxes, open your support mailbox and click Email forwarding. Turn on Forward all emails sent to this mailbox and choose Forward to an external email address. Paste the forwarding address.Tick Deliver message to both forwarding address and mailbox to keep a copy in Outlook. Click Save.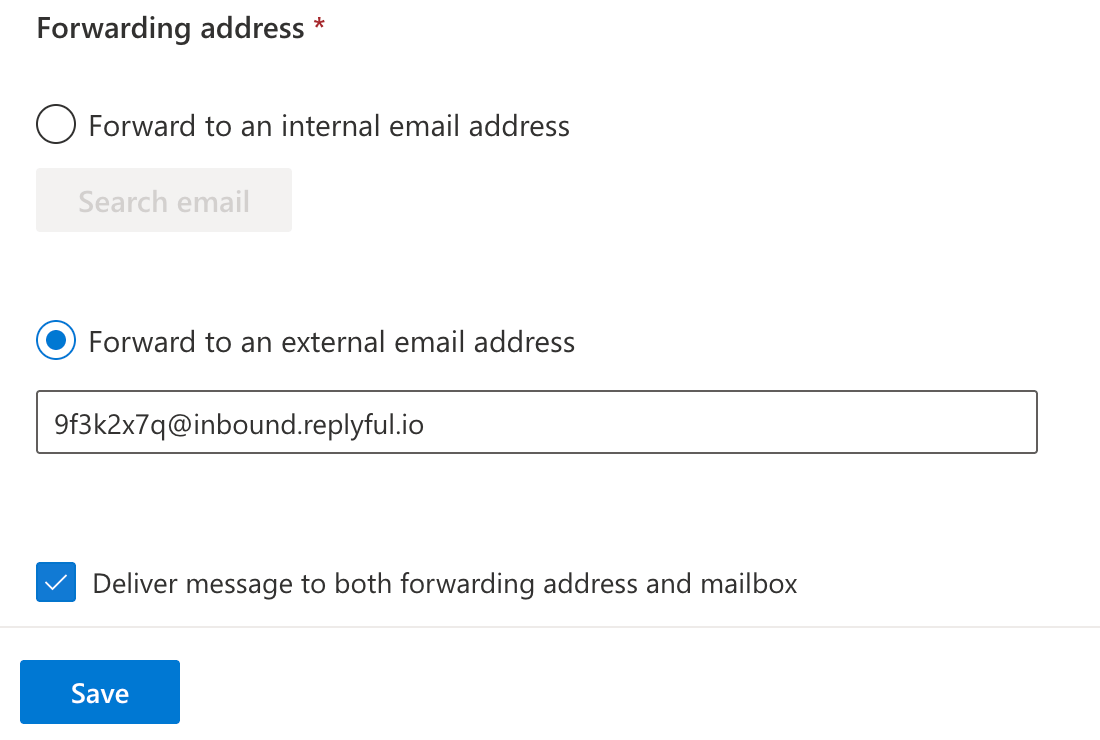
4
Send a test email
From an address outside your organization, send an email to your support address. It should show up as a ticket in your Replyful inbox within a minute.